 Should you put flooring under appliances, apart from above? The current cabinets/appliances are often not expected to be removed because they are in appropriate condition. Yet it also needs to repair the flooring. As noted earlier, it is possible to lay the flooring right up to the cabinets if you add thin flooring, such as luxury carpet, laminate, or tile.
 Similarly, do hardwood floors go under appliances, one may ask?
Under refrigerators and any other moveable appliance such as a range, the hardwood flooring should surely be installed.
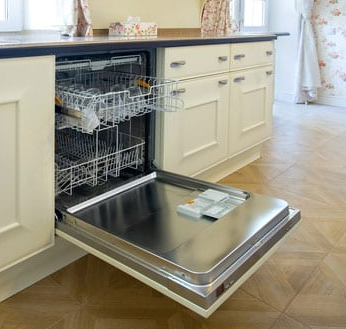
There are adjustable legs or feet for dishwashers mounted below the countertop, similar to many refrigerators. Until sliding it into place, the legs allow you to lower the unit and lift it to align the face of the unit with the lower edge of the countertop. In a dishwasher recess, vinyl floors are usually mounted, while built-up flooring terminates along the front edge of the recess, such as tile and hardwood. It takes a bit of planning and experience of plumbing connections to install a dishwasher. A beginner needs to have the guidance of an experienced installer.
Preparation
In front of the recess in the cabinets, place the dishwasher on a piece of cardboard, with its back facing the recess. If a tile or hardwood floor is planned but not yet built, the cardboard is not required. Leave enough space in the recess to function. With a screwdriver, cut the access panel below the front door of the dishwasher.
From front to back, weigh one side of the dishwasher and add 2 inches. Notice the measurement. Use a 1-inch flat wood bit to rig a power drill. Measure the side of the sink cabinet from the front of the recess and mark the side of the recess at the measurement point. Measure up from the floor and 16 inches to make a corresponding mark. Drill out the hole at this position for the dishwasher drain hose.
Drill another 1-inch hole 6 inches below the hose hole to feed the water supply line of the copper tubing at the back of the dishwasher through the side of the recess to the water supply valve under the sink for attachment.
Measure up to the underside of the countertop at the front of the recess from the subfloor or flooring and subtract 1/2 inch for clearance. To adjust the legs on the dishwasher up or down as required for the 1/2-inch clearance, use an open-end wrench. Plug the dishwasher power cord into the electrical socket at the back of the recess wall. Insert, through the necessary holes at the side of the cabinet recess, the end of the drain hose and the end of the copper tubing water line. Ask an assistant as you drive the dishwasher into the recess to bring the hose and tubing into the sink drawer.
Installation Within
Open the doorway to the dishwasher. Align the attachment tabs with the cabinet's face frame on either side of the dishwasher recess on the outer sides of the dishwasher. To change the front legs, use the open-end wrench so that the top of the door is 1/4-inch from the underside of the countertop.
Mount the drill with a screw-tip extension. Connect the tabs with a 1-inch wood screw at the machined hole in each tab to the face frame on each side. Close the door of the dishwasher and hand-attach the panel to the front.
Slide a hose clamp under the sink cabinet to the end of the drain hose. On the side of the garbage disposal, tie the hose to the round nozzle and secure the clamp with a screwdriver. For now, when the disposal is not installed, secure the clamp on the hose.
At the end of the copper tubing water line, screw the fitting onto the smaller threaded nozzle at the supply valve for hot water. The sink faucet's supply line is attached to the wider nozzle of the dual supply valve. With an open-end screw, tighten the fitting.